| CPC B23F 17/006 (2013.01) [B23F 5/163 (2013.01); B23F 5/202 (2013.01); B23F 5/205 (2013.01); B23F 5/22 (2013.01); B23F 19/00 (2013.01); B23F 21/005 (2013.01); Y10T 29/5176 (2015.01); Y10T 409/10795 (2015.01); Y10T 409/108586 (2015.01); Y10T 409/108904 (2015.01)] | 14 Claims |

|
1. A method for machining a gearwheel comprising:
providing a workpiece in the form of a gearwheel comprising a tooth system, the tooth system comprising a plurality of teeth, each tooth having a tip surface partially defining a tip circle diameter of the tooth system;
rotating the gearwheel about a workpiece axis of rotation (Rw); and
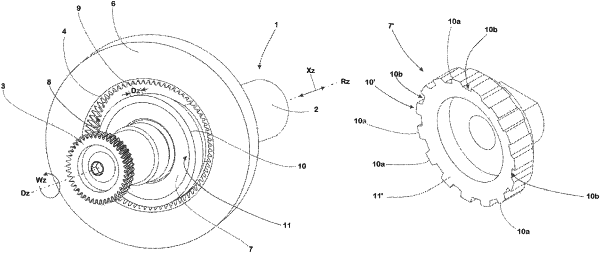
machining the tip surface of at least one tooth of the plurality of teeth of the tooth system by removing chips from the tip surface of the at least one tooth using a tool that rotates about a tool axis of rotation (Rz) oriented at an axial distance (A′, A″) from the workpiece axis of rotation (Rw),
wherein the tool is disk-shaped and machines the tip surface of the at least one tooth using at least one partial segment of a circumferential edge of the tool that is configured as a defined blade,
during the machining, the tool is moved relative to the gearwheel and/or the gearwheel is moved relative to the tool, such that the tool sweeps over the tip surface of the at least one tooth,
the machining of the tip surface of the at least one tooth changes the tip circle diameter by removing a portion of the tip surface of the at least one tooth, and
the tool axis of rotation (Rz) is oriented, with respect to the workpiece axis of rotation (Rw), at an axis intersection angle (Σ″) of 5° to 40°.
|