| CPC C23C 14/083 (2013.01) [C23C 14/28 (2013.01); H01J 37/32477 (2013.01); H01L 21/67069 (2013.01); H01J 2237/332 (2013.01)] | 9 Claims |

|
1. A component comprising
a film containing yttrium oxide, the film having monoclinic crystals of the yttrium oxide, and an average diameter of the monoclinic crystals being 0.1 μm or more and 5 μm or less, wherein:
a mass ratio of the monoclinic crystals is determined from an X-ray diffraction pattern of the film, and the mass ratio is 60% or more;
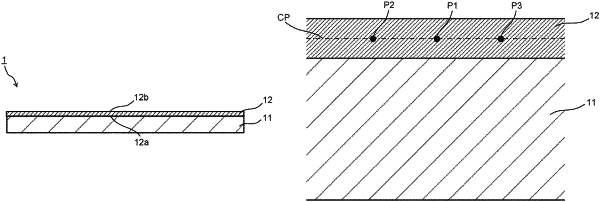
a cross section of the film has a first portion, a second portion, and a third portion, and the first to third portions are 0.5 mm or more away from each other;
an observation of the cross section using a scanning electron microscope at 5,000 magnifications gives an observation image in which a maximum diameter of each pore in a unit area of 10 μm×10 μm is 0 μm or more and 1 μm or less;
the film has a first face on a base member and a second face opposite to the first face;
an observation of the second face using a laser microscope at 50 magnifications gives an observation image in which a ratio of a surface area of a region corresponding to the observation image in the second face to an area of observation image is 250% or more and 700% or less; and
a Vickers hardness B1 measured in the first portion, a Vickers hardness B2 measured in the second portion, a Vickers hardness B3 measured in the third portion, and an average value A of the Vickers hardnesses B1 to B3 are numbers satisfying 0.8A≤B1≤1.2A, 0.8A≤B2≤1.2A, and 0.8A≤B3≤1.2A, the average value A being 600 or more.
|