| CPC G06T 7/0006 (2013.01) [G01N 21/8851 (2013.01); G01N 2021/8887 (2013.01); G06T 2207/10056 (2013.01); G06T 2207/20224 (2013.01); G06T 2207/30108 (2013.01)] | 5 Claims |

|
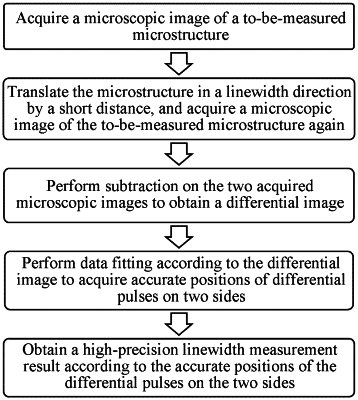
1. A microscopic non-destructive measurement method of a microstructure linewidth based on a translation difference, comprising the following steps:
step 1: acquiring a microscopic image of a to-be-measured microstructure;
step 2: translating the microstructure in a linewidth direction by a short distance, and acquiring a microscopic image of the to-be-measured microstructure again;
step 3: performing subtraction on light intensities of the two acquired microscopic images to obtain a differential image;
step 4: performing data fitting on light intensity data of the differential image by using a Gaussian function as a target, and locating accurate positions of differential pulses on two sides by using Gaussian function extreme points; and
step 5: obtaining a high-precision linewidth measurement result according to the accurate positions of the extreme points on the two sides,
wherein the high-precision sample linewidth measurement result is obtained based on a distance between extreme points of a Gaussian pulse curve obtained by fitting, a positioning resolution of an extreme point is much higher than a system imaging resolution, uneven illumination only affects a pulse height and does not change a pulse position, and a distance between extreme points of two pulses is equal to a distance between sample step edges, that is, a linewidth.
|