| CPC G01N 29/0645 (2013.01) [G01N 29/09 (2013.01); G01N 29/34 (2013.01); G01N 2291/0237 (2013.01); G01N 2291/02827 (2013.01); G01N 2291/044 (2013.01); G01N 2291/048 (2013.01)] | 6 Claims |

|
1. An ultrasonic detection and tensile calibration test method for bonding strength grade, comprising:
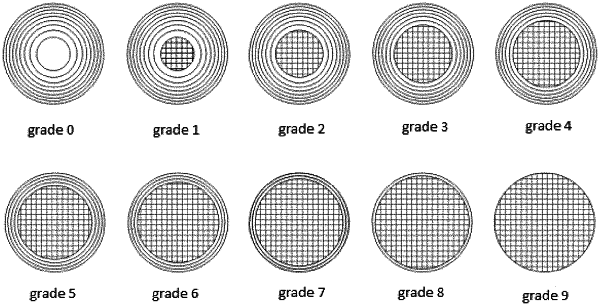
a step 1 of arranging an upper substrate block and a lower substrate block on a tensile testing machine respectively, wherein the upper substrate block is fixedly arranged, and an upper surface of the lower substrate block is provided with nine bonding grooves of the same area;
a step 2 of bonding the upper substrate block to the bonding groove(s) to form a theoretical bonding area slv, and a downward actual tensile force is applied to the lower substrate block;
a step 3 of calculating a first actual bonding strength σsj1 by using the actual tensile force in the step 2 and an actual bonding area ssj of the theoretical bonding area scanned by using an ultrasonic scanning method, and the first actual bonding strength σsj1 is compared with a second actual bonding strength σsj2 calculated by an equation to verify the correctness of a method that uses the theoretical bonding area as a calibrated bonding strength;
a step 4 of repeating the steps 2 and 3 multiple times to form a bond strength table in which the theoretical bonding areas, the actual bonding areas and the first actual bonding strengths are in one-to-one correspondence, wherein the theoretical bonding area slv and the actual tensile force in each of the multiple times are different from those in other times; and
a step 5 of performing a C-scan on an adhesive layer of a workpiece made of the same material of which bonding strength needs to measure to obtain the actual bonding area of the workpiece, and the actual bonding strength corresponding to the actual bonding area is retrieved from the bonding strength table.
|